
Knowing how to plaster a wall is a valuable skill that can significantly improve the appearance, durability, and functionality of your walls, whether in homes or commercial properties. Well-plastered walls offer not only a smooth and polished appearance but also provide structural benefits like added insulation, enhanced durability, and protection against damage.
In this comprehensive guide, we’ll cover everything you need to know about how to plaster a wall, including preparing walls, applying plaster, repairing damage, and achieving professional finishes. With these detailed instructions, you’ll gain the confidence to transform your walls into flawless surfaces.
What is Plastering? An Overview
Plastering is the process of applying a smooth or textured material to walls and ceilings to enhance their appearance, protect them from damage, and create a base for decorative finishes like paint or wallpaper. This time-tested technique has been used for centuries, evolving from traditional lime and clay mixtures to modern materials like gypsum and cement-based plaster.
Plastering serves both functional and aesthetic purposes. Functionally, it creates a protective layer that shields walls from environmental damage, moisture, and wear. Aesthetically, it provides a seamless surface that enhances the look of interior and exterior spaces.
Types of Plaster
Understanding the types of plaster available can help you choose the best option for your project:
- Gypsum Plaster: Lightweight and easy to work with, gypsum plaster is ideal for creating smooth, polished surfaces and is commonly used in interior spaces.
- Cement Plaster: This durable option is perfect for exterior walls, offering excellent resistance to weather conditions and wear.
- Lime Plaster: Known for its flexibility and breathability, lime plaster is often used in older buildings to maintain structural integrity and allow moisture to escape.
- Clay Plaster: An eco-friendly option often chosen for sustainable construction projects, offering natural aesthetics and insulation properties.
Why is Plastering Essential?
Plastering is more than just an aesthetic upgrade—it’s a crucial step in construction and maintenance. By mastering how to plaster a wall, you can:
- Extend the lifespan of your walls.
- Prepare surfaces for decorative treatments.
- Protect structures from moisture, cracks, and other damage.
Benefits of Proper Wall Plastering
Investing in professional-quality plastering offers a range of benefits that go beyond surface appearance. Here are the key advantages:
1. Enhanced Durability
A properly plastered wall is resistant to damage caused by environmental factors like humidity, temperature changes, and daily wear and tear. The additional layer of protection shields the underlying structure, ensuring your walls last longer without requiring frequent repairs.
2. Smooth and Attractive Surfaces
Plastering creates a flawless base for further treatments, whether it’s paint, wallpaper, or decorative finishes. Smooth, even walls elevate the overall look of a room, making spaces appear more polished and well-maintained.
3. Improved Insulation
Plaster acts as an additional insulating layer, contributing to better thermal and acoustic performance. This is particularly beneficial for homes and offices, as it helps regulate indoor temperatures and reduces noise transmission between rooms.
4. Resistance to Moisture and Cracking
Plastered walls are better equipped to handle moisture, which helps prevent issues like damp patches, mould, and peeling paint. It also minimises the formation of cracks over time, maintaining the structural integrity of the walls.
5. Cost-Efficiency
While plastering may involve an initial investment, it reduces the need for frequent repairs and touch-ups. For homeowners and business owners, this means long-term savings and less disruption to daily life or operations.
6. Increased Property Value
Professionally plastered walls contribute to the overall value of a property by enhancing its aesthetics and structural quality. Whether you’re renovating a home or upgrading a commercial space, plastering is a worthwhile investment.
7. Customisation Opportunities
Plastering allows for creative customisation. From smooth modern finishes to textured, decorative options, you can tailor the look to suit your style preferences. This makes it a versatile solution for diverse design needs.
By ensuring that walls are properly plastered, you can enjoy all these benefits while creating a space that is both functional and visually appealing. For those keen on learning how to plaster a wall, the rewards go far beyond the effort involved.
Tools and Materials You’ll Need to Get Started
Before beginning any plastering project, it’s essential to have the right tools and materials. Using high-quality equipment and supplies not only makes the process easier but also ensures a professional and durable finish. Below is a comprehensive list of tools and materials you’ll need, along with explanations of their importance.
[H5] Essential Tools for Plastering
- Plastering Trowels
- Trowels are the primary tool for applying and smoothing plaster onto walls. A high-quality stainless steel trowel ensures smooth application and prevents rusting over time.
- Hawks
- A hawk is a flat tool used to hold plaster while you’re applying it to the wall. It allows for easy access to the plaster mixture, reducing strain and speeding up the process.
- Mixing Buckets
- Large, sturdy buckets are necessary for mixing plaster and water. It’s important to have enough capacity to prepare the right amount of plaster for each session.
- Plaster Mixers or Paddle Mixers
- A paddle mixer is used to combine plaster powder and water into a smooth, lump-free mixture. This tool ensures consistent results, which are vital for even application.
- Straight Edges and Spirit Levels
- Straight edges help level the plaster, ensuring an even surface. Spirit levels are used to check for horizontal and vertical alignment.
- Plastering Floats
- Used for finishing, floats help smooth the surface and eliminate any imperfections after the initial application.
- Jointing Knives
- Smaller than trowels, these knives are useful for precise work, such as applying filler or touching up corners.
- Sandpaper or Sanding Blocks
- Fine-grit sandpaper is used after the plaster has dried to achieve a perfectly smooth finish, ready for painting or decorating.
- Protective Gear
- Safety goggles and gloves protect your eyes and hands from dust, debris, and chemicals during the plastering process.
- Drop Cloths or Plastic Sheets
- These are essential for covering floors and furniture to protect them from plaster splatters.
Essential Materials for Plastering
- Base Coat Plaster
- A thicker plaster used for the first layer. It provides the structure and base for additional coats.
- Skim Coat Plaster
- This is a finer plaster used for the final layer to create a smooth and polished finish.
- Bonding Agent
- Helps improve adhesion between the wall and plaster, especially on smooth or non-porous surfaces like concrete or old painted walls.
- Filler or Joint Compound
- Used to fill in cracks, holes, or gaps before applying plaster.
- Waterproofing Additives (Optional)
- In areas prone to moisture, such as bathrooms or kitchens, waterproofing additives can be mixed into the plaster for added protection.
- Masking Tape
- Used to protect edges, sockets, and adjoining surfaces from being accidentally covered with plaster.
How to Prepare a Wall for Plastering
Proper preparation is the foundation of a successful plastering job. Skipping or rushing this step can result in poor adhesion, uneven surfaces, or cracks in the plaster. Here’s how to prepare your wall for plastering in detail:
Step 1: Assess the Wall
- Inspect for Damage:
Look for cracks, holes, damp spots, or peeling paint. Identifying these issues early helps you address them before applying plaster. - Determine the Surface Type:
Different surfaces (e.g., brick, concrete, or painted walls) require different preparation techniques.
Step 2: Clean the Surface
- Remove Dust and Dirt:
Use a damp cloth or a brush to wipe away dust, cobwebs, and loose debris. A clean surface ensures the plaster adheres properly. - Degrease if Necessary:
For kitchen walls or areas exposed to grease, use a degreaser to eliminate any oily residue.
Step 3: Remove Old or Loose Paint
- Scrape Away Flaking Paint:
Use a scraper or wire brush to remove old paint that’s peeling or flaking. This prevents uneven plaster application. - Sand the Surface:
Sanding roughens smooth paint surfaces, improving the plaster’s grip.
Step 4: Address Cracks and Holes
- Fill Small Cracks:
Use a filler or joint compound to fill minor cracks and holes. Let it dry completely before sanding it smooth. - Repair Large Cracks or Damage:
For larger issues, apply a bonding agent and multiple layers of filler or plaster to build up the area gradually.
Step 5: Apply a Bonding Agent
- Purpose of Bonding Agents:
Bonding agents help plaster stick better to smooth or non-porous walls, such as concrete or painted surfaces. - How to Apply:
Use a roller or brush to evenly coat the wall with a bonding agent. Allow it to dry according to the manufacturer’s instructions before moving to the next step.
Step 6: Protect Adjacent Areas
- Cover Edges and Fixtures:
Use masking tape to protect skirting boards, door frames, sockets, and light switches. - Lay Drop Cloths:
Cover the floor and any furniture in the room to avoid splatters.
Step 7: Mark Out the Wall
- Divide into Sections:
For large walls, mark out smaller sections to work on one at a time. This helps maintain consistency and ensures the plaster doesn’t dry out before it’s smoothed.
Step 8: Prime the Wall (Optional)
- When to Prime:
If you’re working with highly absorbent surfaces like brick or new plasterboard, applying a primer prevents the wall from absorbing too much moisture from the plaster.
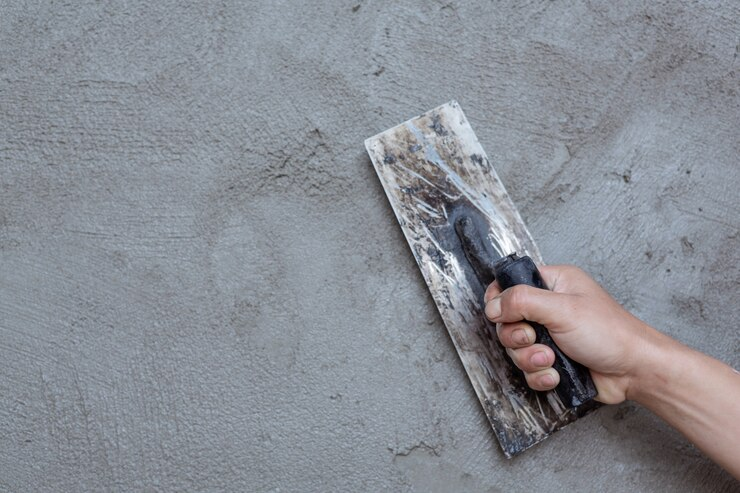
Step-by-Step Instructions for Plastering a Wall
Plastering a wall involves precision, patience, and the right techniques to achieve a smooth and durable finish. Below is a detailed breakdown of the seven key stages of plastering, ensuring you can approach the task confidently:
1. Mix the Plaster
Proper mixing is crucial for a consistent application. Follow these steps:
- Use a clean mixing bucket to prevent impurities from affecting the plaster’s consistency.
- Gradually add the plaster powder to water, not the other way around, to avoid lumps.
- Mix the plaster using a paddle attachment on a power drill or a manual mixing stick.
- Aim for a creamy, lump-free texture. The ideal consistency should be thick enough to hold on a trowel but not so stiff that it’s hard to spread.
Pro Tip: Work with small batches as plaster sets quickly, typically within 30–60 minutes.
2. Apply the Base Coat
The base coat forms the foundation for a strong and durable finish. Here’s how to do it:
- Load the plaster onto a hawk, then scoop it with a trowel.
- Start at the top of the wall and work downward in smooth, upward strokes.
- Apply the plaster in thin layers, roughly 2–3 mm thick, for even coverage.
- Overlap strokes slightly to ensure no gaps or exposed areas.
Pro Tip: Keep the trowel angled slightly to control the thickness and avoid uneven patches.
3. Level the Surface
After applying the base coat, level the surface to remove excess plaster and ensure uniform thickness:
- Use a straight edge or darby to smooth the plaster by running it horizontally and vertically across the wall.
- Fill in any low spots with additional plaster and re-level until the surface is consistent.
Pro Tip: Hold a light at an angle to the wall to spot uneven areas.
4. Apply a Skim Coat
The skim coat creates a polished finish:
- Mix a thinner batch of plaster for the skim coat to ensure it spreads easily.
- Apply the skim coat in a similar manner to the base coat, using light, even strokes.
- Focus on achieving a smooth and seamless appearance.
Pro Tip: Apply slight pressure with the trowel to compress the skim coat for a polished look.
5. Smooth and Level the Skim Coat
For a professional finish:
- Use a clean, wet trowel to smooth the surface while the plaster is still damp.
- Work in overlapping arcs to eliminate trowel lines and imperfections.
Pro Tip: Regularly clean your tools during this stage to prevent dried plaster from marring the finish.
6. Allow the Plaster to Dry
Drying time depends on factors like plaster thickness, temperature, and humidity:
- A thin skim coat typically dries within 24 hours, while thicker layers may take up to 48 hours.
- Avoid painting or decorating until the plaster is fully cured and light pink in colour.
Pro Tip: Ensure good ventilation during drying but avoid exposing the wall to direct heat, which can cause cracks.
7. Sand the Surface
The final step is sanding the dried plaster to achieve a perfectly smooth surface:
- Use fine-grit sandpaper or a sanding block.
- Focus on removing high spots, bumps, or imperfections left during application.
Pro Tip: Wipe the wall with a damp cloth after sanding to remove dust before painting.
Repairing and Replastering Damaged Walls
Damaged walls can detract from the appearance and integrity of your property, but with the right approach, they can be repaired and restored seamlessly. Here’s how to tackle common issues when repairing and replastering:
Identifying the Cause of Damage
Before starting repairs, it’s essential to identify the root cause of the damage to prevent recurring issues:
- Moisture Damage: Check for leaks, condensation, or rising damp. Address the moisture source before replastering.
- Structural Movement: Cracks caused by shifts in the building’s structure may require professional intervention.
- Impact Damage: Holes or dents from accidental impacts are typically easier to fix.
Repairing Small Cracks and Holes
For minor damage, follow these steps:
- Clean the Area: Remove loose plaster or debris from the crack or hole. Use a brush or vacuum for thorough cleaning.
- Apply Filler: Use a flexible filler or patching compound to fill the crack or hole. Overfill slightly to allow for sanding.
- Smooth the Surface: Use a putty knife to smooth the filler flush with the surrounding wall.
- Sand and Prime: Once dry, sand the area for a seamless finish and apply a primer before painting.
Pro Tip: Use a filler designed for plaster walls to ensure compatibility and durability.
Replastering Larger Damaged Areas
For extensive damage, such as large cracks, bulging plaster, or missing sections, follow these steps:
- Remove Loose or Damaged Plaster: Use a scraper or chisel to carefully remove any loose material around the damaged area.
- Apply a Bonding Agent: Coat the exposed wall or remaining plaster with a bonding agent to improve adhesion.
- Reapply Base Coat Plaster:
- Use a trowel to apply a new base coat, ensuring it blends smoothly with the surrounding plaster.
- Allow the base coat to partially set before applying additional layers.
- Add a Skim Coat: Apply a thin finishing layer to create a polished, uniform surface.
- Sand and Smooth: Once dry, sand the entire repaired section to match the texture of the existing wall.
Pro Tip: When blending old and new plaster, feather the edges of the new application for a seamless transition.
Dealing with Damp or Mould Issues
If the damage is caused by dampness or mould, take these steps:
- Fix the source of moisture, such as leaks or inadequate ventilation.
- Treat affected areas with an anti-mould solution before replastering.
- Use a moisture-resistant plaster for added protection.
Finishing the Repaired Wall
After repairs, take these final steps to complete the process:
- Sand the repaired section to ensure a smooth and even surface.
- Prime the wall with a suitable primer to prevent paint absorption.
- Repaint the wall or apply a decorative finish to restore its appearance.
Learning how to plaster a damaged wall ensures your repairs are long-lasting and visually seamless. Whether you’re fixing cracks, holes, or extensive damage, these techniques will help you restore the beauty and functionality of your walls.
FAQs: Everything You Need to Know About Plastering
What are the seven stages of plastering?
The seven stages of plastering outline the complete process for achieving a smooth, durable wall finish:
- Preparation: This involves cleaning the wall, repairing any damage, and applying a bonding agent to ensure the plaster adheres properly. Proper preparation is critical to avoid issues like peeling or cracking later.
- Mixing the Plaster: Plaster must be mixed to the right consistency. Gradually add plaster powder to water and stir until it forms a smooth, lump-free mixture with the consistency of thick cream.
- Base Coat Application: A base coat is applied using a trowel, working from top to bottom in smooth, overlapping strokes. This layer provides structure and fills any imperfections.
- Levelling: The base coat is smoothed and levelled using a straight edge or darby, ensuring a flat surface with no bumps or gaps.
- Skim Coat Application: A thinner layer of plaster, known as the skim coat, is applied over the base coat. This layer creates the polished finish.
- Smoothing and Finishing: While the skim coat is still damp, a wet trowel is used to smooth out any imperfections, compress the surface, and achieve a professional-grade finish.
- Drying and Sanding: Once the plaster has fully dried (24–48 hours), the surface is sanded to remove any minor imperfections and prepare it for painting or decorating.
How do you plaster a wall for beginners?
Beginners can plaster a wall successfully by breaking the process into manageable steps and following these guidelines:
- Gather Tools and Materials: Assemble essential tools, including a trowel, hawk, mixing bucket, and sandpaper. Use quality plaster to ensure durability.
- Prepare the Wall: Clean the surface thoroughly, remove loose debris, and repair any cracks or holes. Apply a bonding agent to improve plaster adhesion.
- Mix the Plaster: Follow the manufacturer’s instructions to mix the plaster. A paddle mixer can help beginners achieve the right consistency, which should resemble thick cream.
- Apply in Sections: Start at the top corner of the wall and work downward. Apply plaster in small, manageable sections to maintain control and consistency.
- Focus on Thin Layers: Beginners often make the mistake of applying plaster too thickly. A 2–3 mm layer is ideal for the base coat.
- Smooth Gradually: Use a wet trowel to smooth the surface as you go. Work on small imperfections before they set, as hardened plaster is difficult to correct.
- Practice Patience: Let each layer dry completely before adding more plaster or finishing touches. Rushing the process can lead to cracks or uneven surfaces.
Where to start when plastering a wall?
When plastering a wall, always start at the top corner and work your way downward. Here’s why this approach is effective:
- Gravity: Working from the top ensures that any excess plaster or drips fall onto the areas you haven’t covered yet, making it easier to clean up and maintain consistency.
- Control: Starting at the top allows you to focus on achieving a smooth finish without worrying about disrupting already plastered sections below.
- Blending: This method ensures that each section blends seamlessly with the next, as you can feather edges downward.
If the wall is large, divide it into smaller sections using vertical and horizontal guidelines. This helps you maintain even application and avoid drying before you’ve finished smoothing adjacent areas.
How to plaster a damaged wall?
Plastering a damaged wall requires careful preparation and multiple steps to ensure a seamless repair. Here’s a detailed guide:
- Assess the Damage: Identify the type and extent of the damage. Small cracks may only require filler, while larger holes or crumbling plaster may need complete replastering.
- Remove Loose Material: Use a scraper or chisel to clear away any loose or flaking plaster. This ensures a solid base for the new plaster to adhere to.
- Clean the Surface: Dust and debris can prevent proper adhesion. Wipe the area clean with a damp cloth or vacuum it.
- Apply a Bonding Agent: For larger repairs or smooth surfaces, apply a bonding agent to help the plaster stick.
- Reapply Plaster:
- Start with a base coat, spreading it evenly over the damaged area.
- Let the base coat partially dry before applying a thin skim coat to achieve a smooth finish.
- Blend the Edges: Feather the edges of the new plaster to blend seamlessly with the existing wall. Use a damp trowel to smooth transitions.
- Sand and Paint: Once dry, sand the repaired area to match the surrounding surface. Prime the area before repainting for the best results.
How to repair cracks in plaster walls?
Repairing cracks in plaster walls involves more than just filling the gaps—it requires stabilising the surface to prevent future cracking. Follow these steps:
- Identify the Type of Crack:
- Hairline Cracks: These are small, superficial cracks caused by drying or slight movements in the wall.
- Structural Cracks: Wider cracks may indicate underlying issues like moisture or foundation shifts that need addressing first.
- Clean the Crack: Use a utility knife or scraper to widen the crack slightly, creating a clean surface for the filler. Brush or vacuum out dust and debris.
- Apply Filler:
- For hairline cracks, use a ready-mixed filler or spackling compound. Apply it with a putty knife, ensuring the filler penetrates the crack fully.
- For larger cracks, consider using joint tape or mesh to reinforce the area before applying the filler.
- Smooth the Surface: Once the filler is applied, smooth it with a putty knife to ensure it’s level with the surrounding wall.
- Sand the Area: After the filler has dried, sand it down with fine-grit sandpaper to remove any excess material and create a seamless surface.
- Prime and Paint: Apply a coat of primer to the repaired area before repainting. This ensures the paint adheres evenly and hides the repair.
Why Athena Best Painting Services is Your Trusted Choice
When it comes to professional wall plastering and painting, Athena Best Painting Services stands out as a trusted provider. If you’re searching for expert assistance with how to plaster a wall or require complete painting solutions, we have the expertise and dedication to bring your vision to life.
Here’s why Athena Best Painting Services is the ideal choice for your next project:
- Highly Skilled Painters: Our experienced team has mastered techniques for achieving smooth finishes and seamless repairs. From learning how to plaster a wall to applying the perfect paint, our professionals ensure top-quality work.
- High-Quality Materials: We use only the finest quality paints and materials to ensure long-lasting durability and a flawless appearance.
- Comprehensive Services: Beyond plastering, we offer a wide range of services, including interior and exterior painting, specialised finishes, and maintenance painting for both residential and commercial properties.
- On-Time Project Completion: Time is valuable, and we guarantee that all projects are completed on schedule without compromising quality.
- 100% Satisfaction Guarantee: At Athena, we take pride in delivering results that exceed expectations. Your satisfaction is our priority.
Get Expert Wall Plastering Solutions – Contact Athena Now!
Are you ready to transform your walls with professional wall plastering and painting services? At Athena Best Painting Services, we provide reliable solutions tailored to meet your unique needs. Whether you need help mastering how to plaster a wall, repairing damaged plaster, or creating a beautiful finish, our team is here to assist.
Don’t wait to enhance your space. Book a free consultation or quote! Let us help you achieve the flawless, durable walls you deserve.